Upgrading eMMC: Yes, it is possible!
June 22, 2023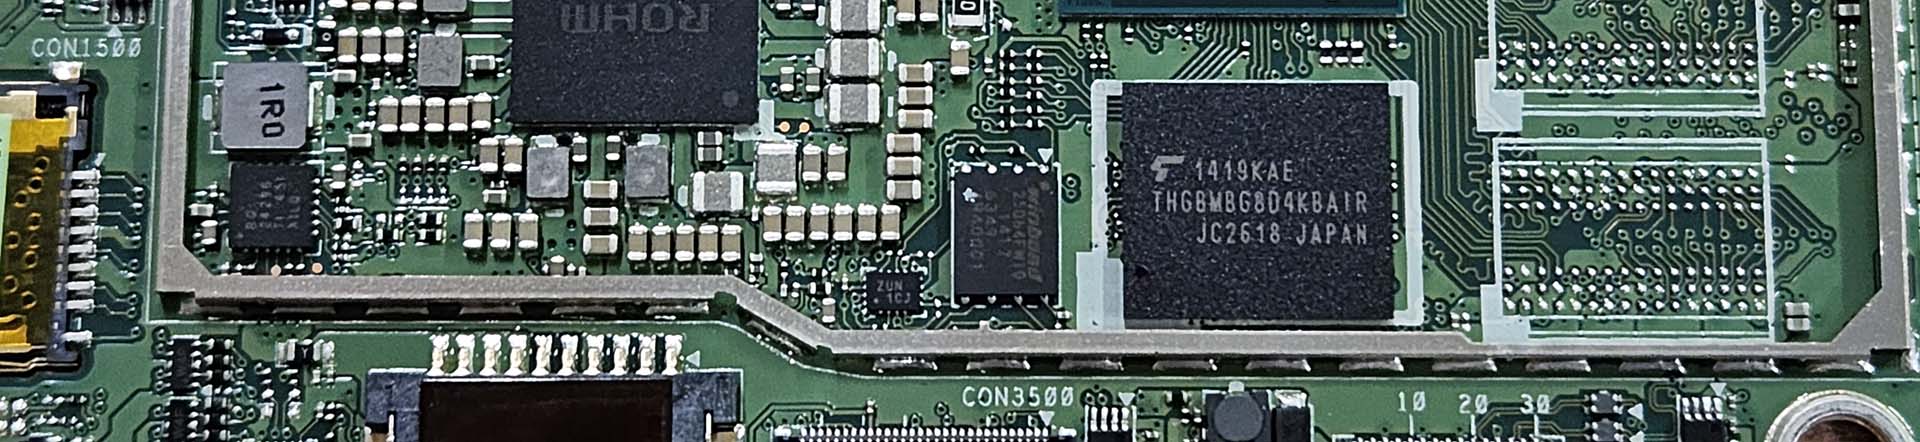
The short short version: Can you replace/upgrade those little eMMC storage chips soldered onto the motherboards of cheap Windows laptops and tablets? Yes, as long as you have the proper equipment, a steady hand, a compatible bios, and a little bit of good luck.
After purchasing a few cheap Windows tablets used online, I quickly found that they are severely limited by the 16 and 32GB eMMC storage they are typically equipped with. These devices usually come with a 2-core Intel Celeron or 4-core Intel Atom processor, soldered-on eMMC storage, and 1 or 2GB of DDR3 RAM. These machines can still be used with Windows 10 in 2023, provided that they aren't subjected to high processing loads. Interestingly, they often use 32-bit BIOS or UEFI firmware despite being equipped with 64-bit processors. This means that they can usually only run 32-bit installations of Windows or Linux, though there are a few exceptions (see MX Linux; vanilla Debian also seems to work). I have found that compressed 32-bit Windows 10 installations usually require approximately 14GB of space, though installing other applications like Office or Chrome will quicly baloon the amount of drive space used. 64GB drives can be used, though probably not for a long period of time. For this reason, I have been attempting to replace the storage in various laptops and tablets with 128GB BGA153 eMMC drives. Every datasheet and schematic I look at suggest that there shouldn't be a size limit on what chip can be installed, so I decided to test this theory myself. I must admit to less than a 100% success rate, though I hope that documenting my results and process might help other adventurous tinkerers down the line. I want to stress that these computers are NOT fast, even after being upgraded. I wouldn't recommend spending a lot of time or money doing this unless you already have a device available, you find this interesting, and/or you don't mind the risk of breaking your computer in the process.
- Here is my current list of eMMC replacement experimental results: (Updated July 3, 2023)
- >> Acer Aspire Switch 10 SW5-012:
 Works! I updated to the latest BIOS (v1.20) first, not sure if that matters.
 - >> RCA Cambio W101: Works!
- >> Toshiba Encore 2 WT8-B: Works!
- >> Acer CB3-111 Chromebook: Works! I used Coolstar's instructions located here to change the bios BEFORE replacing the eMMC chip.
- >> HP Stream 7: Works!
- >> HP Chromebook 11 G4: Works! Again, I upgraded the bios as above BEFORE replacing the eMMC.
- >> Acer One 10 S1002: Works!
- I will try to keep this list updated as I continue my experiments. First, however, I will go through the process that I used to upgrade one of my machines from 32GB to 128GB of storage.
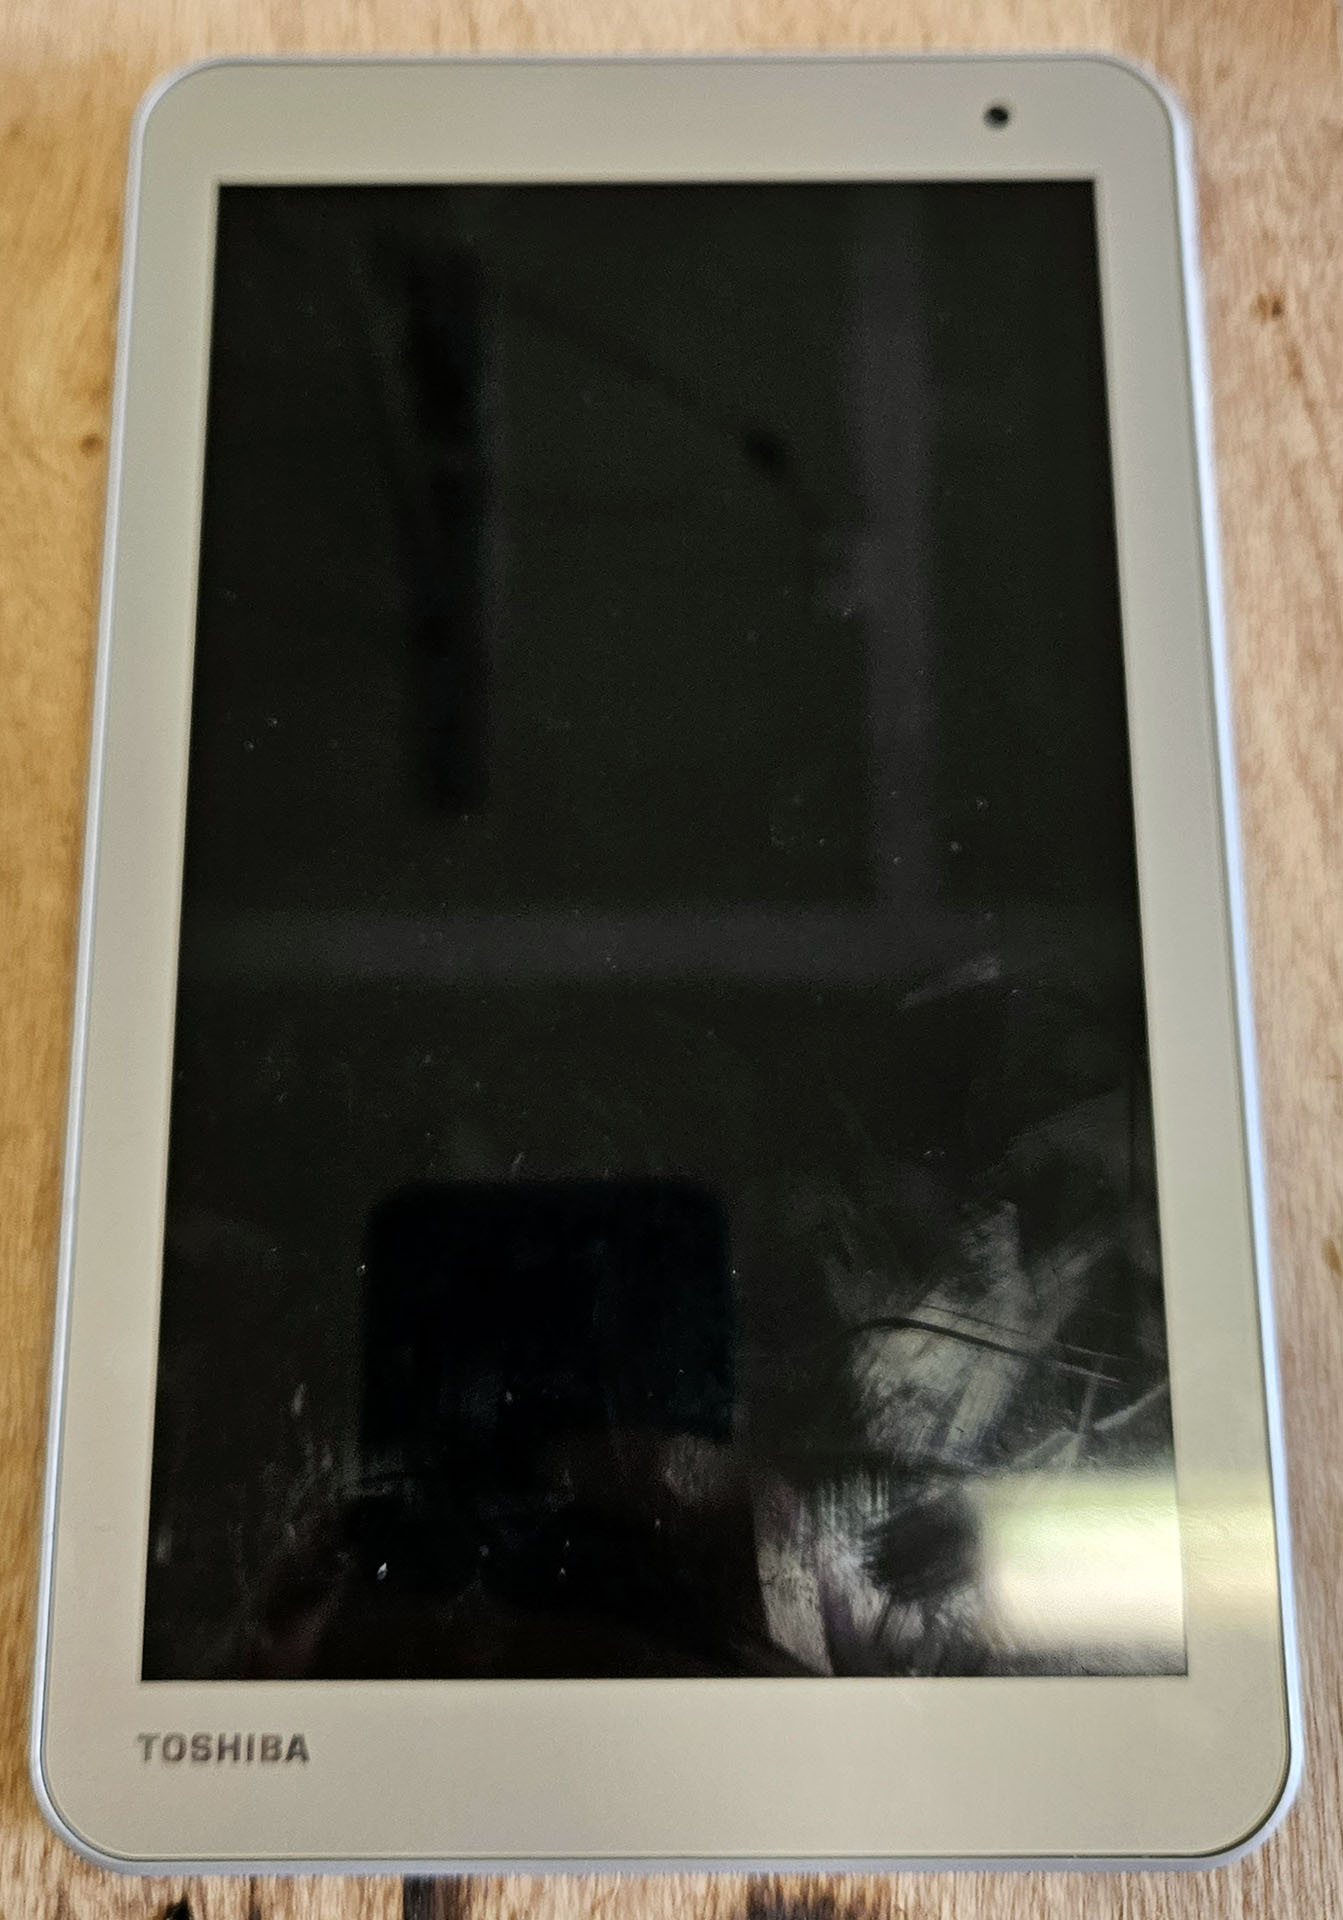
I will focus on upgrading a Toshiba Encore 2 WT8-B. This little tablet sports a 4-core Intel Atom Z3735G CPU, 1 measly gigabyte of RAM, and 32GB of soldered-on eMMC storage. It has an 8-inch screen, just barely big enough for my enormous hands.
There is only one USB port for charging and peripherals, so any long-term mouse or keyboard use will need to be done via bluetooth.
The back panel is held on with clips around the edges, so a small screwdriver or hard pick-type tool can be used to gently pry upwards, popping the clips loose one-at-a-time.
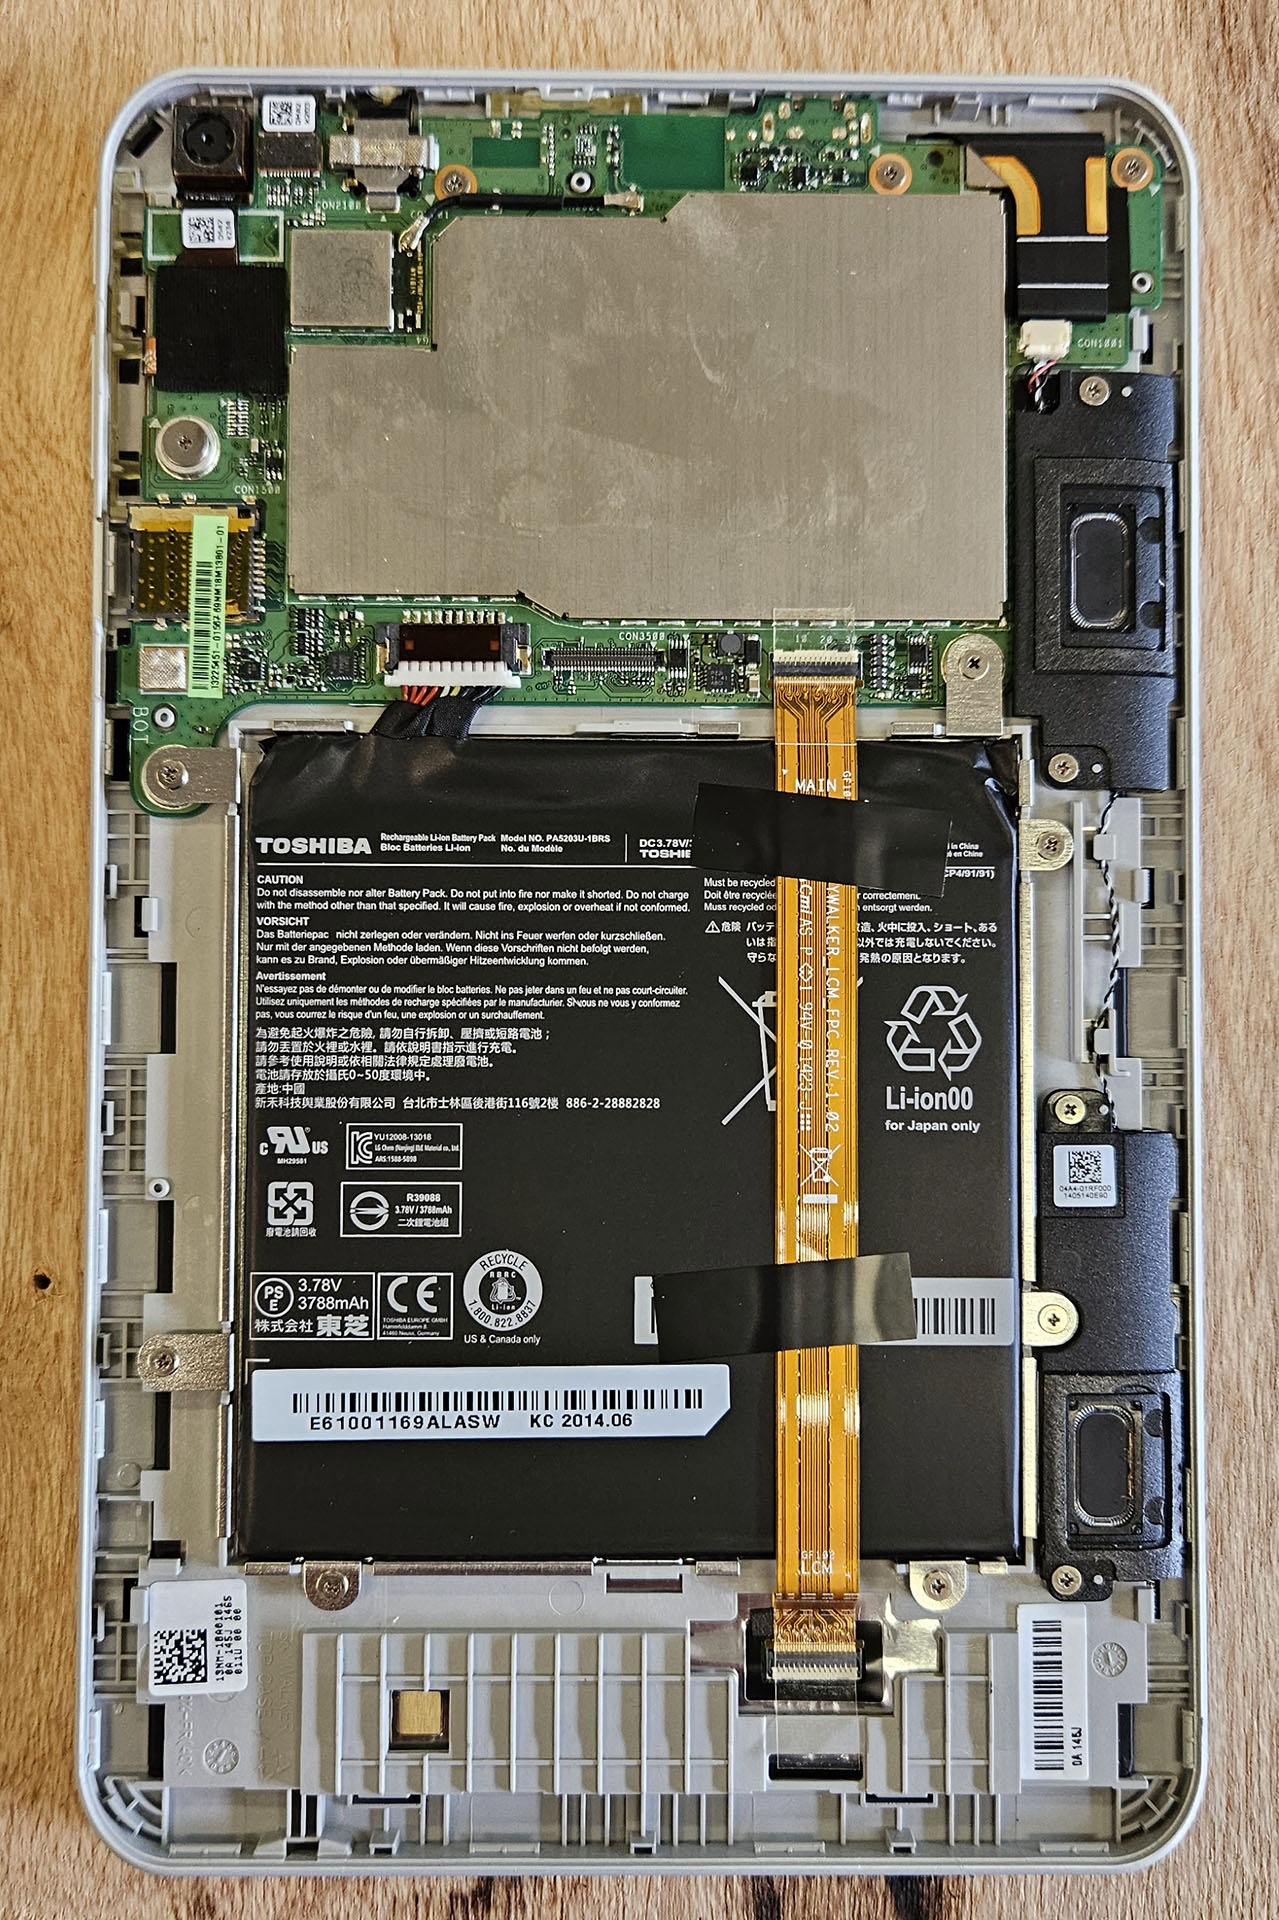
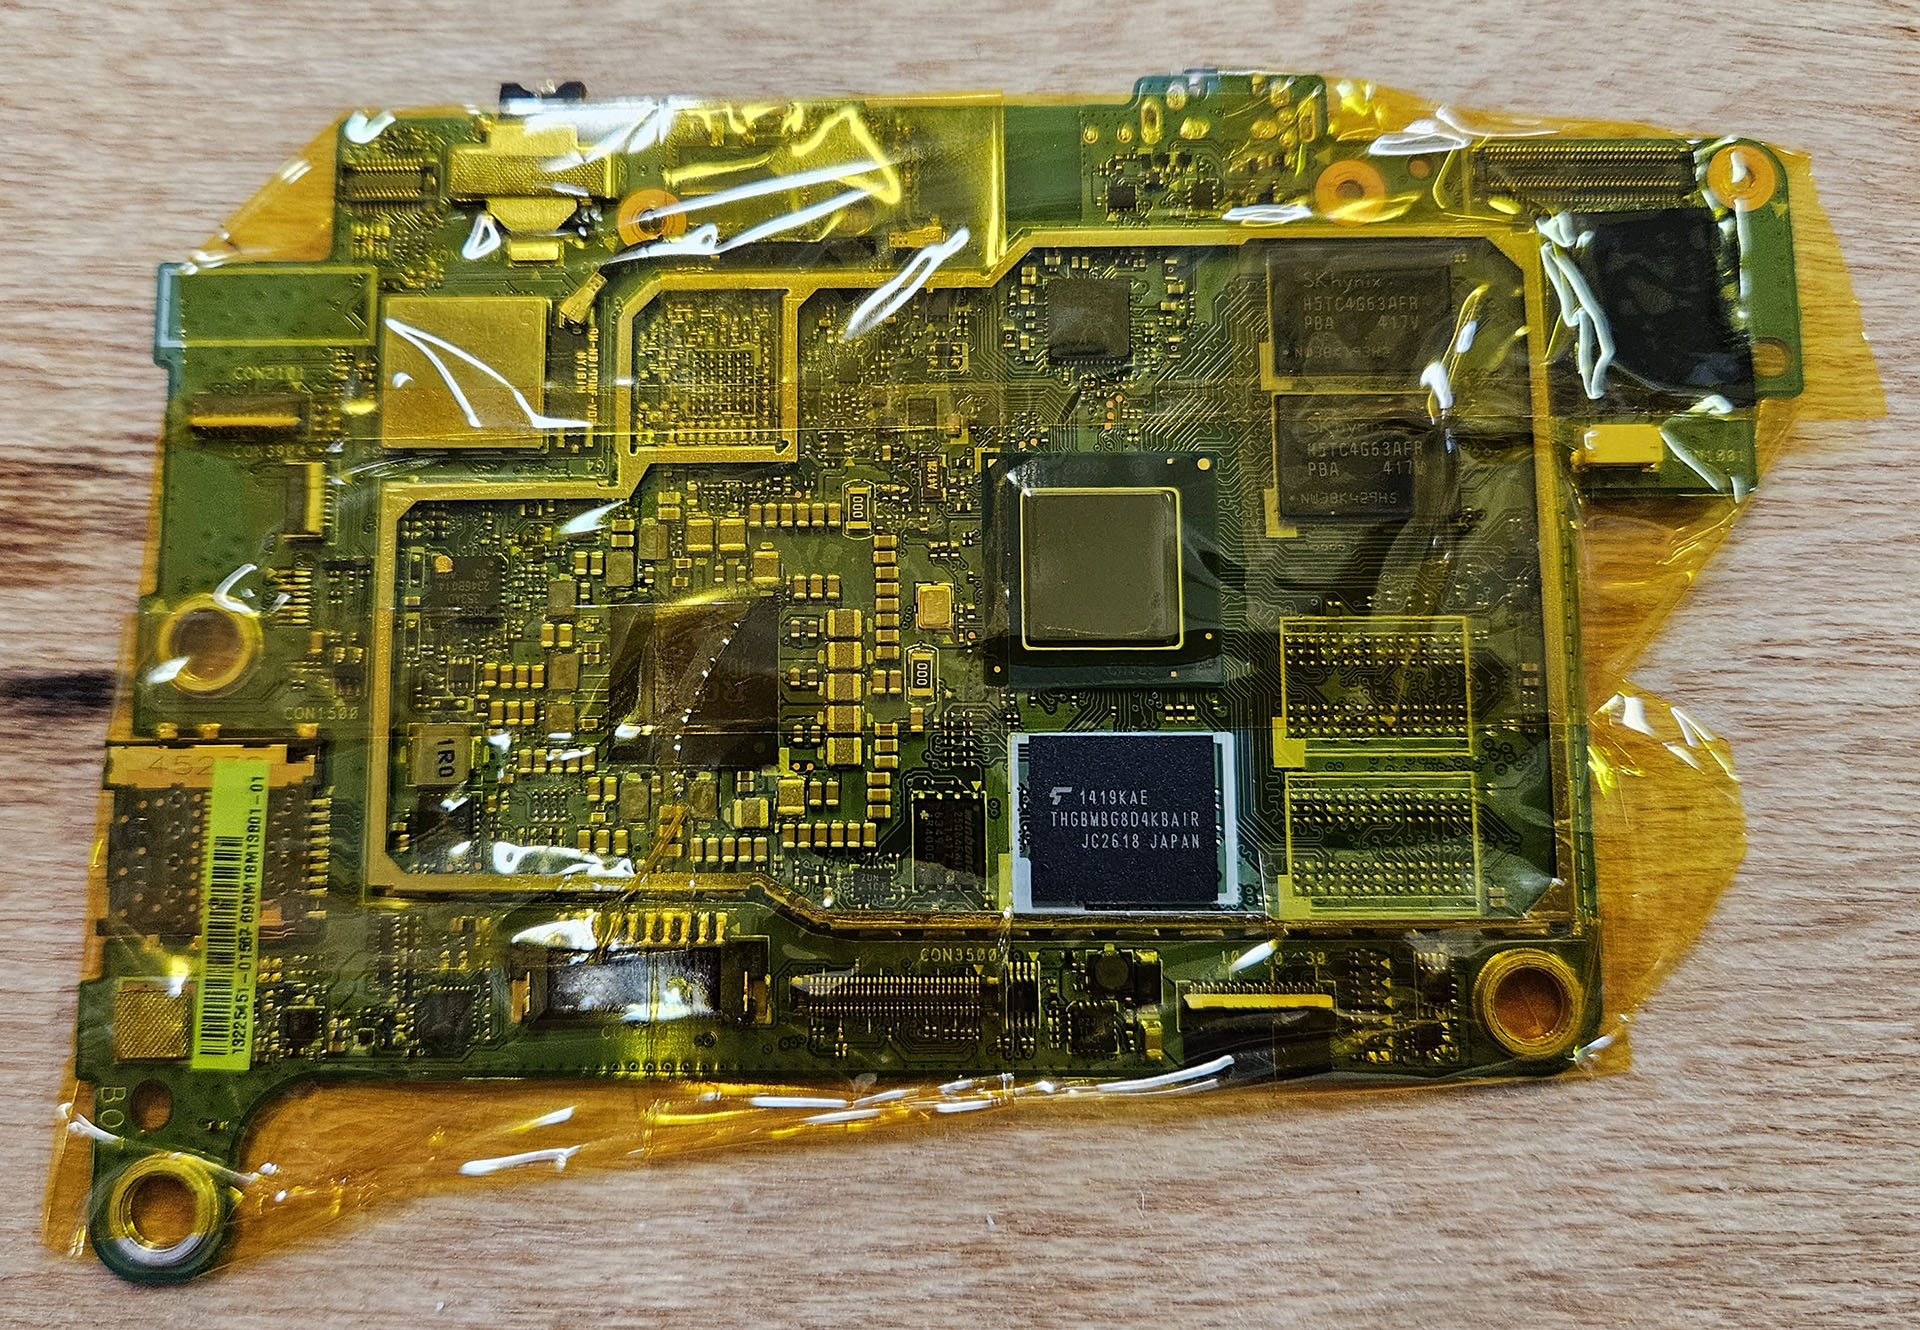
With the back of the case removed, the baby motherboard can be seen at the top; The CPU, RAM, and eMMC chips are located underneath the big metal shield. It seems that most of the case is taken up by the battery.
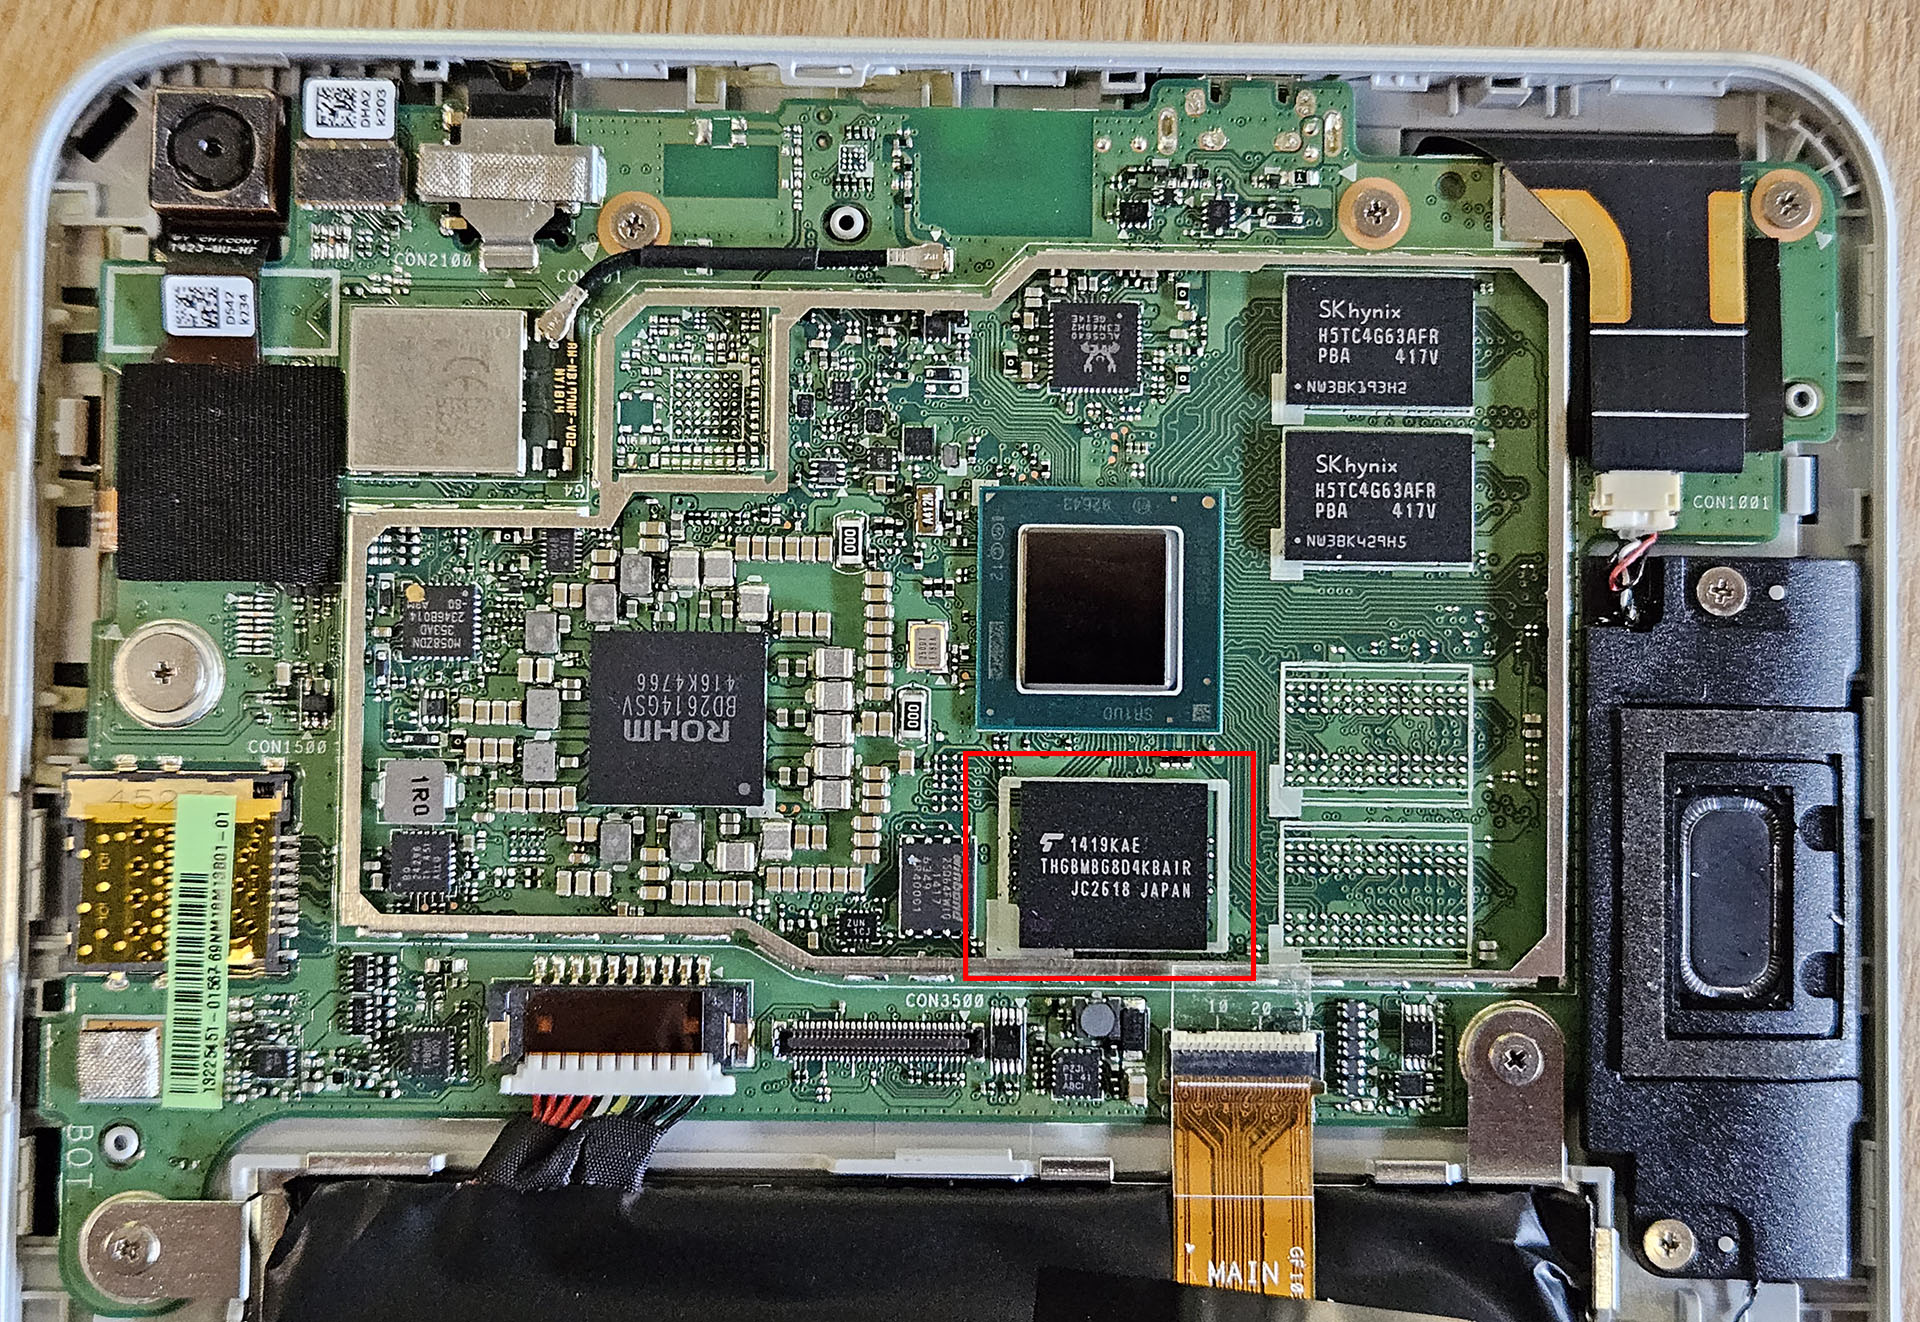
The IC highlighted with the red box is the eMMC chip that we intend to replace. Just above it is the CPU, and to the right are the 512MB RAM chips. It appears that this motherboard is capable of supporting 2GB of RAM, though the Z3735G CPU is only capable of addressing 1GB. Perhaps a CPU swap/RAM upgrade is possible, but that is beyond the scope of this project.
First we will need to carefully disconnect all connectors on the motherboard and remove all screws. For this particular tablet, I also needed to remove the battery and topmost speaker to free the circuit board; the manufacturer apparently needs to cram the parts into this thing pretty tightly.
With the board removed, I covered everything on the board except for the eMMC chip that I planned to desolder. I used 1-inch wide knockoff Kapton tape, which can handle temperatures of about 500F or 260C. I made the mistake of wrapping the tape around the back of the board, causing it to be difficult to remove. This is a learning process, after all.
I warmed up my hot air rework station to about 380C and set the air velocity to around 50%. I held the air gun with one hand and gently tried to lift the chip with a pair of ESD-safe tweezers in the other hand. After a few seconds the IC was loose. I then let the board, chip, and hot air gun cool.
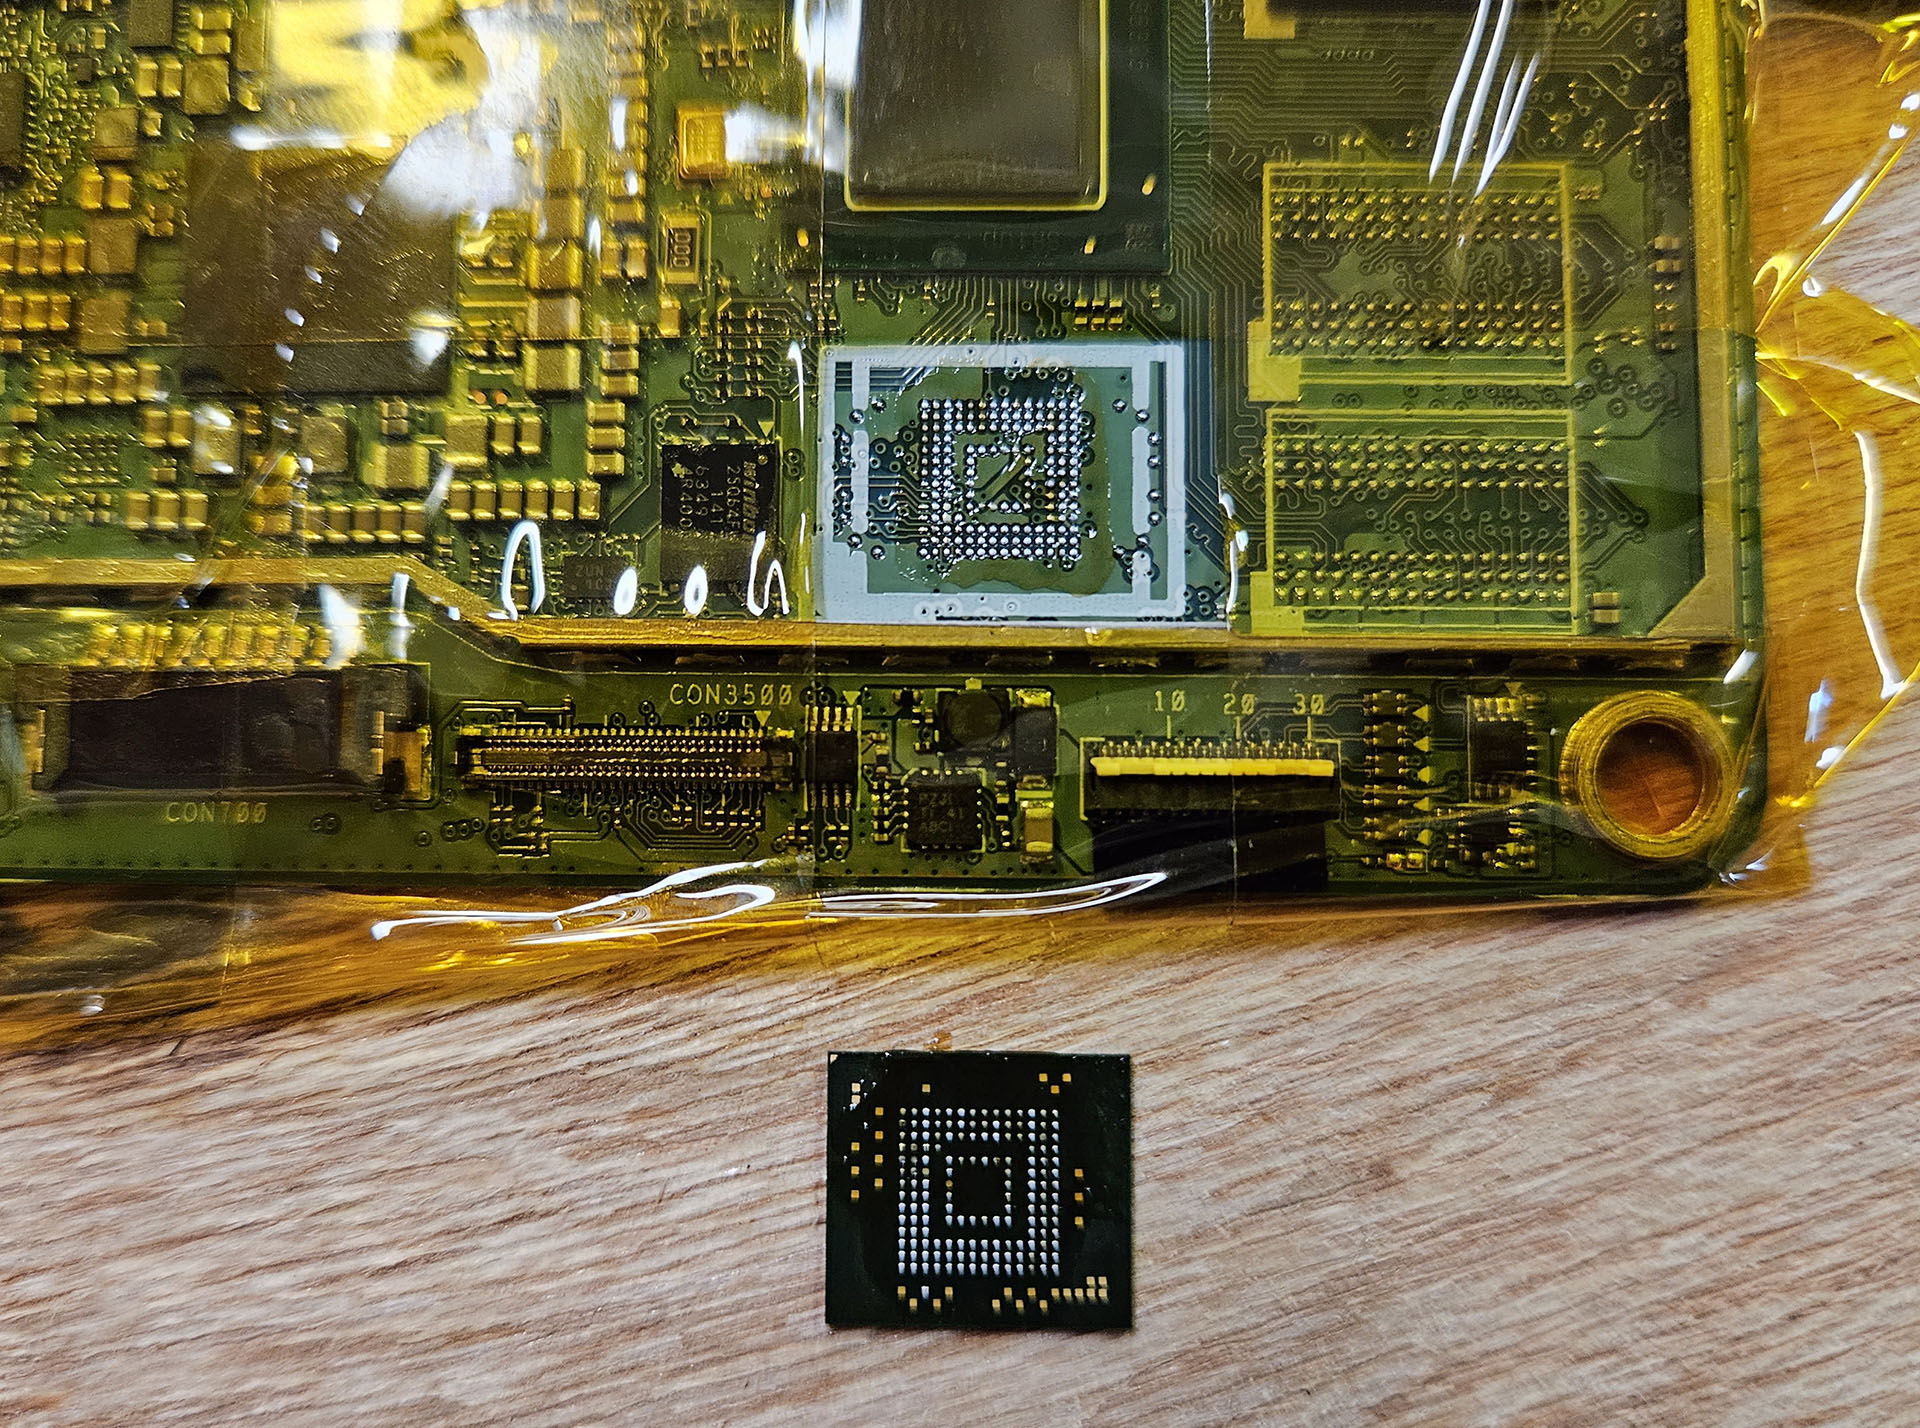
Before soldering the new chip on, I needed to clean excess solder from the circuit board. I spread a thin solder flux over the previously-occupied eMMC zone and wiped the pads with a hot soldering iron. Any solder that remained from the old IC stuck to the iron, leaving behind a clean-ish surface, which I then cleaned again with acetone.
The new eMMC ICs that I ordered came pre-"balled" with solder, so I didn't need to add more. I put a thin layer of flux on the board and carefully lined the new IC up with the chip outlines printed on the PCB. This is extremely finnicky, definitely a task that should be done by a pick-and-place robot.
I warmed up the heat gun to about 350C and set the air velocity to about 20%. I wanted the solder to reach its melting temperature slowly so that the IC wouldn't slide around on the board.

After a few seconds, I could see the eMMC IC slowly sink onto its final resting place. I raised the temperature of the heat gun for a moment just to be sure that the solder was well-melted and let everything cool down.
You might notice that the tape is different in this picture.... It actually took me multiple attempts to get this right. I first tried to use an old IC, one that I tried to "reball" with solder myself. This is not as simple as the YouTube videos make it seem. The tablet did not recognize the storage after the first attempt, so I tried again with a brand new IC.
This image shows the new 128GB eMMC drive soldered onto the motherboard.
Obviously, I then removed the crapton tape, reinserted the board into the tablet, and reconnected everything.
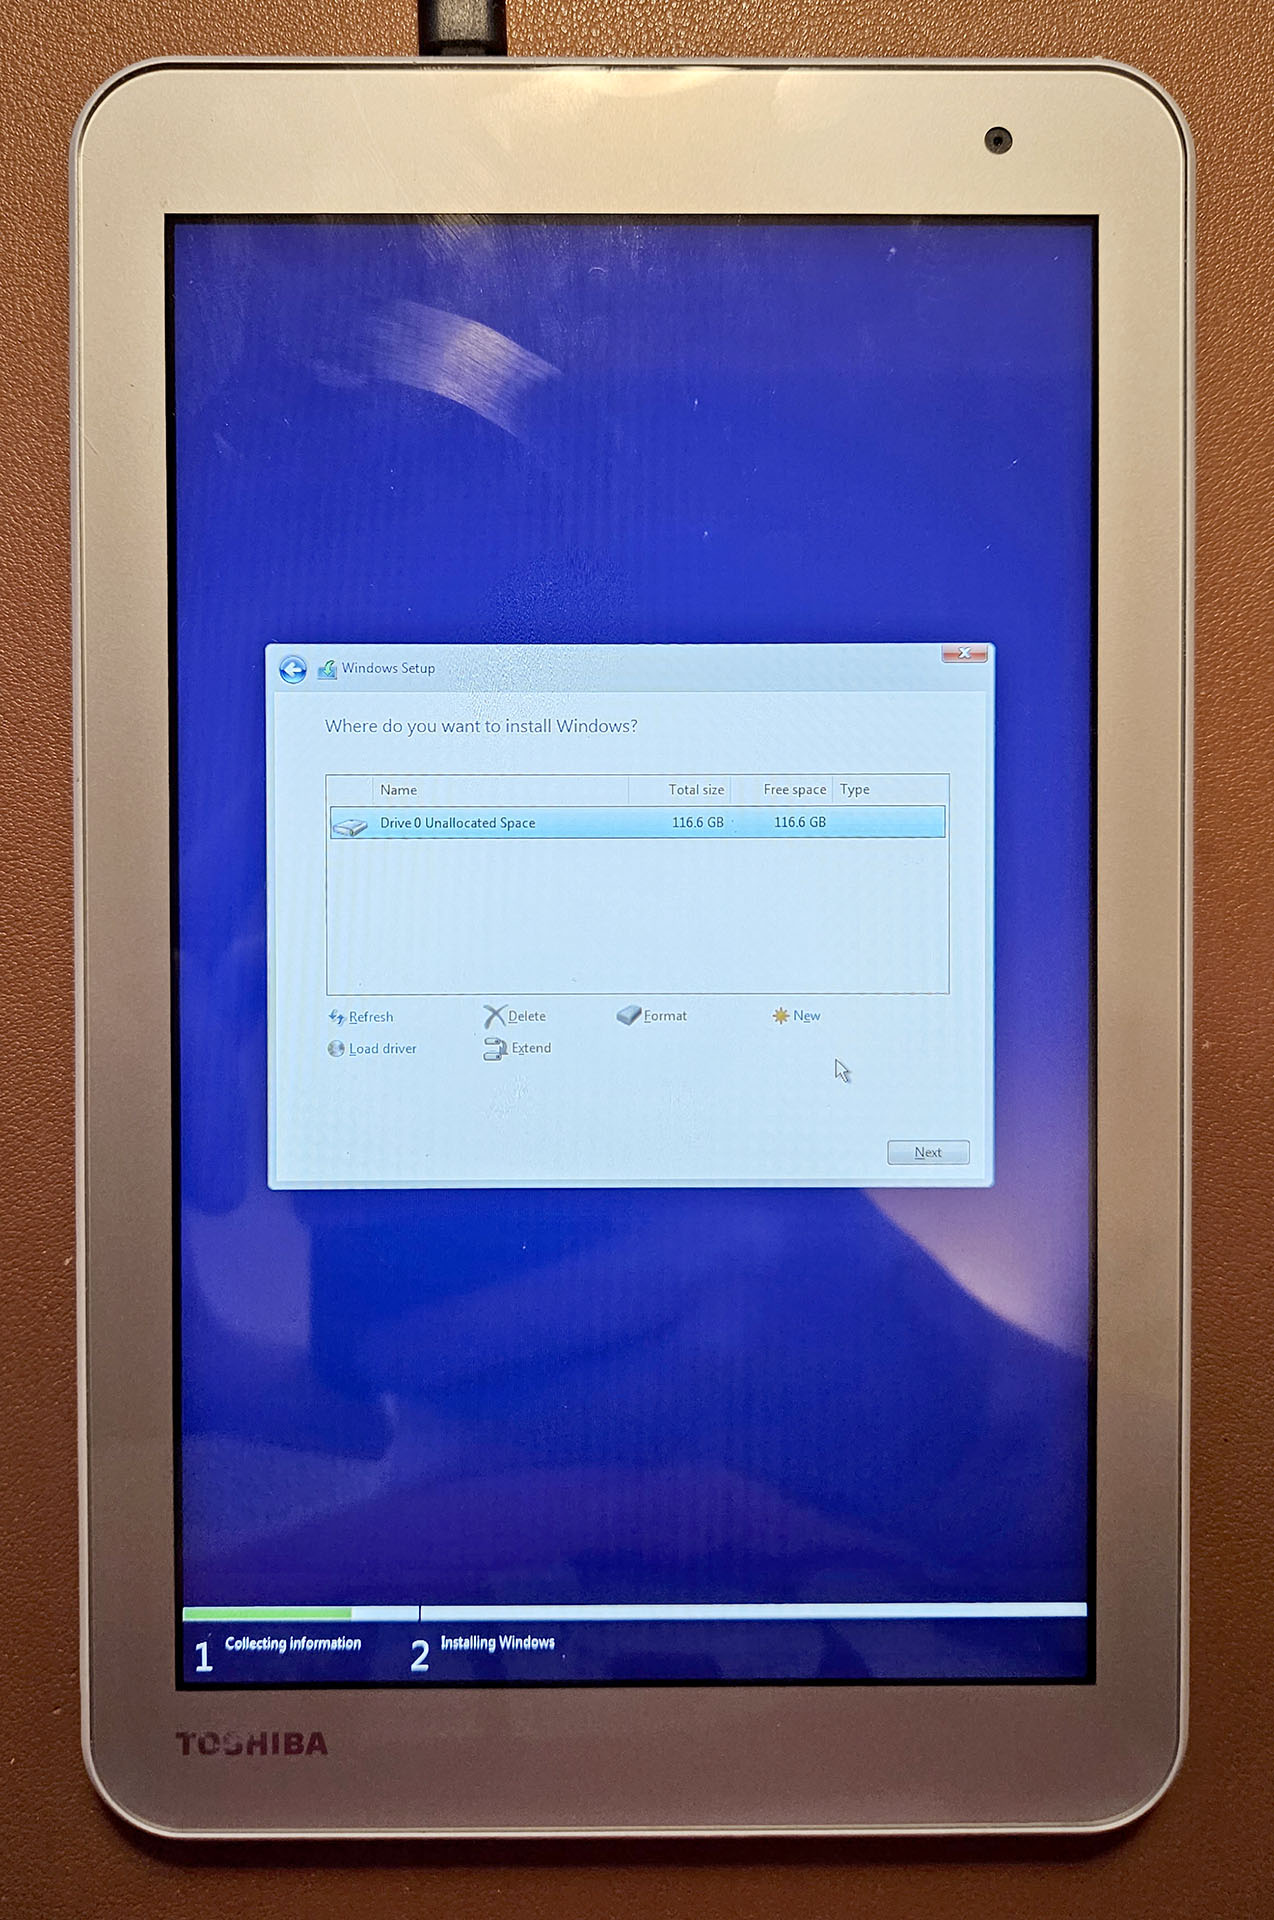
I needed to connect both a keyboard and mouse to have any hope of installing Windows or any other OS. I found one of these OTG dongles with one male micro USB connector, one female micro USB connector, and 3 female USB-A connectors. The male micro USB goes into the tablet, a power source goes into the female micro USB, and the three remaining USB-A connectors host a keyboard, a mouse, and an OS installer USB. Luckily, the installer recognized the eMMC.
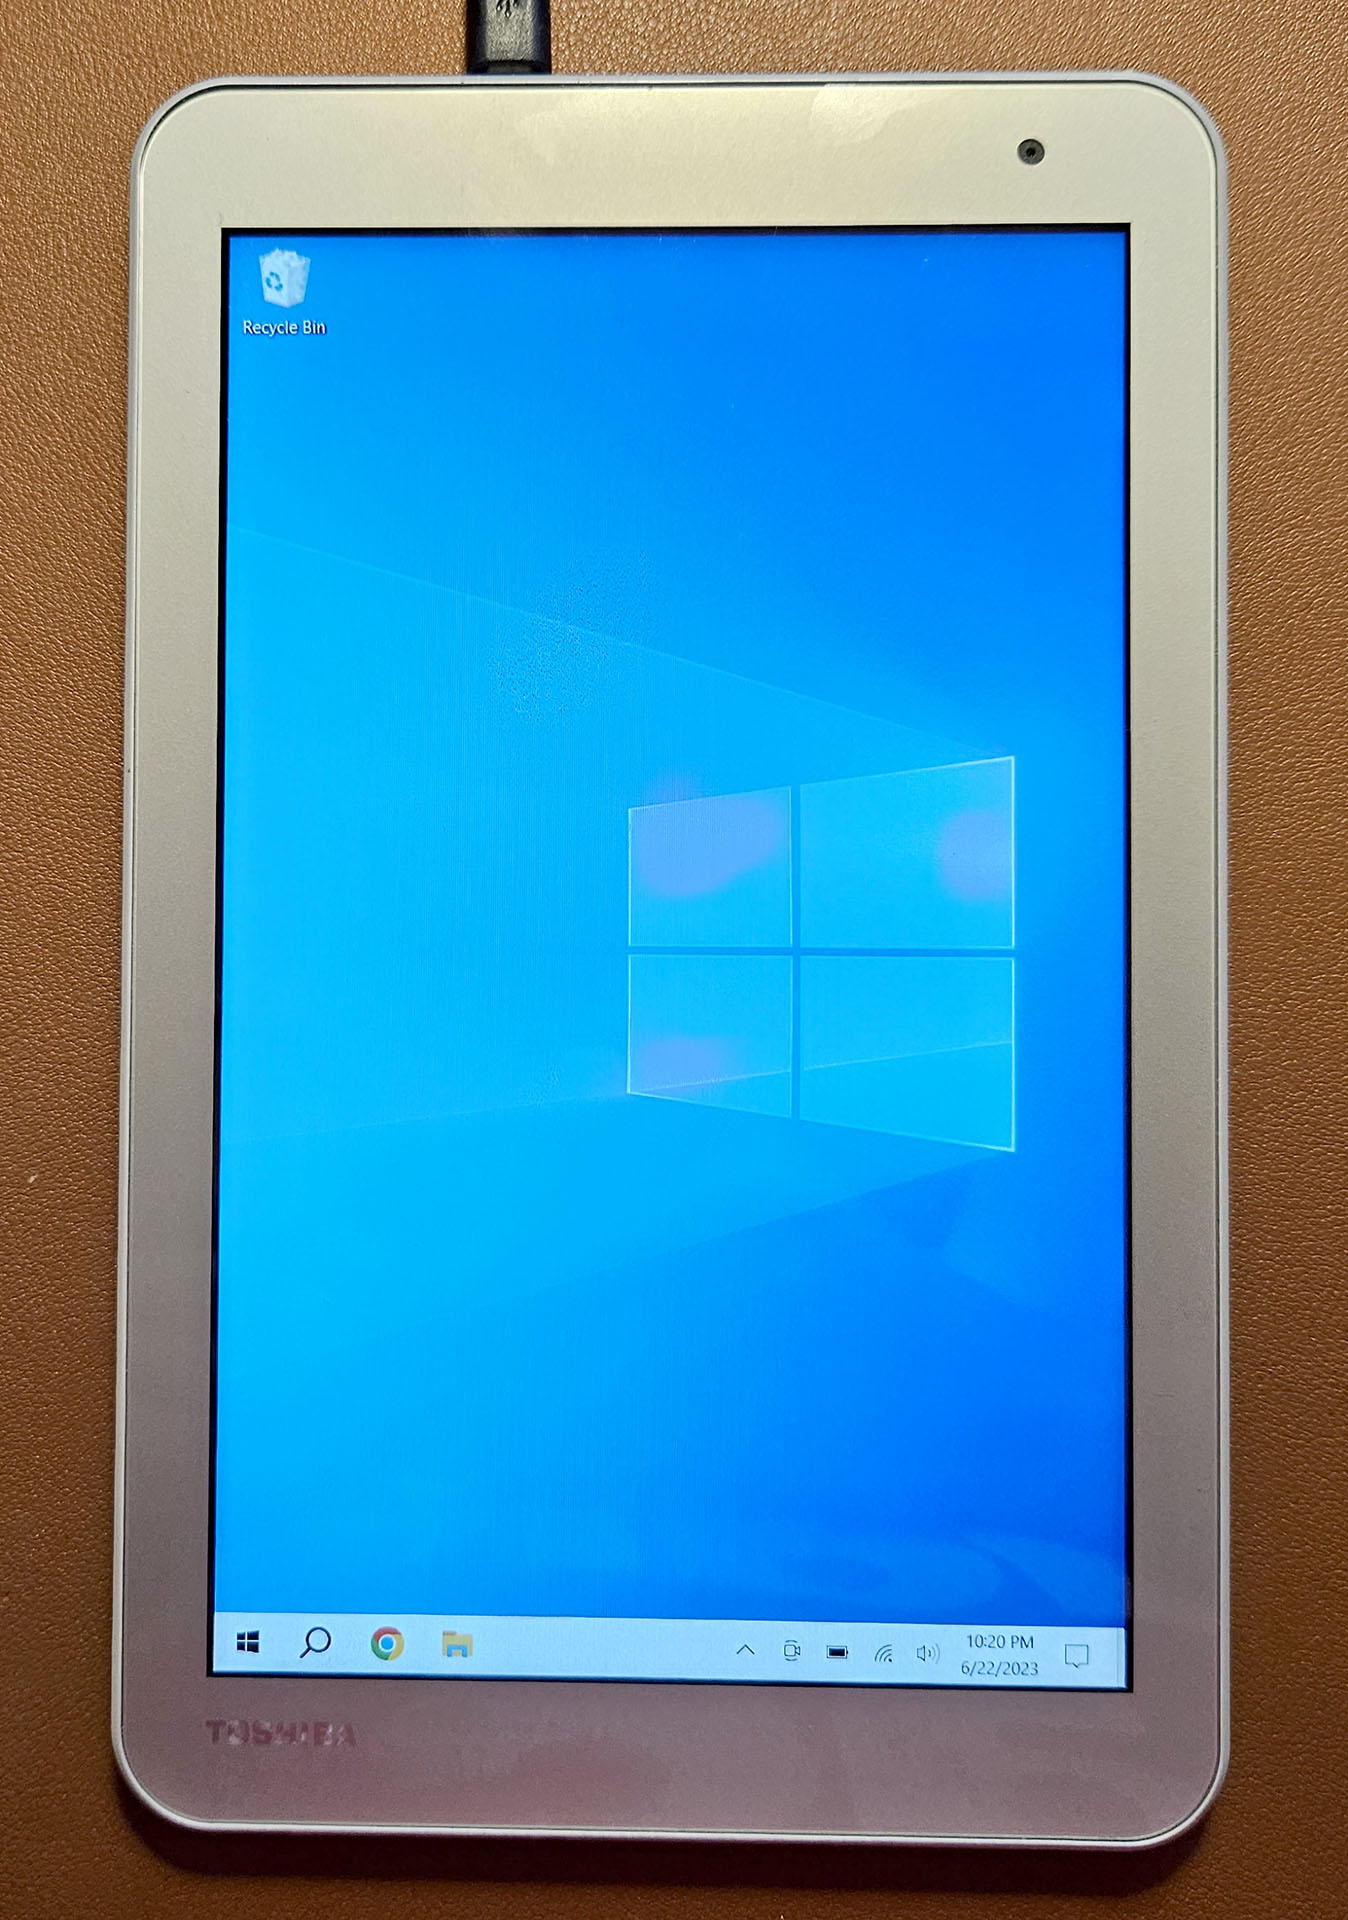
I was fortunate to find all of the drivers on the Dynabook website, which I installed more or less without issue. Generally, the Windows 8 drivers seemed to work the best, if I remember correctly. Because I wanted any speed boost that I could get, I disabled all Startup Apps, turned off animations in Windows, and turned off transparency in Windows. Searching for Startup Apps and seperately for Animations will get you the relevant settings.
And there you have it. Yes, it is possible to upgrade an eMMC drive, even though almost every forum post, Google search, and common sense concern will tell you otherwise. Again, I don't recommend this if you aren't willing to risk the destruction of your device, or if you are looking for the cheapest way to get a usable computer. If you find this fun the way that I do, however, it certainly can be done.
This is not an exhaustive set of instructions for getting this to work, but I hope that it shed some light on what is involved.
Email: jacobcodotnet@gmail.com